Ubuntu Edgy Eft Installation — page 3
6. Preparing Mount Points
It is now time to build up your file system.
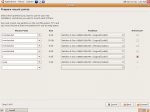
The installer needs to know which partition will be used as the root filesystem (/), the swap space and any other partitions that you might want to be automatically mounted when booting up.
This is actually when the earlier important note comes handy.
So here we go, In my case, I inform the installer that “/” was the mount point of /dev/sda7 and that this partition should be reformated, the swap partition is /dev/sda2 and /home is the mount point of /dev/sda5.
If you need to add more partition and want to give them custom name, simply type the name in the mount point text box.
Once you are done, double check that you have given the right names and partitions and that you are not going to reformat partitions you want to keep intact ![]() .
.
Press Forward … and this is the last step! The installer will remind you the setting you entered and warn you about the fact that this is the last step before datas get actually written to disk.
If you believe that the information you have given are correct, then press Install.
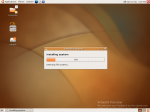
 Installation will proceed, this took about 15-20 minutes on my machine, so have a coffee or simply enjoy your future operating system by using the session you are logged in.
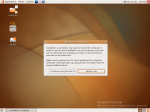
After the time is passed, you should get a confirmation window telling you that your operating system is now installed and that you can now restart your computer to start using it.
That’s it, now you got edgy eft installed on your computer and you can start using one of the most (if not the most) cutting edge linux distribution.
7. Conclusion
The installation process ran flawlessly on my machine, all hardware was detected and my laptop could be used out of the box :).
I say cheers to everybody who contributed to ubuntu edgy eft ;).

